1975 Fender Music Master
It's Alive!
This was the first guitar that I knowingly purchased as a restoration project. I had previously purchased my 1978 and 1976 Strats on eBay, and this would be my 3rd attempt at purchasing a guitar up for auction. I watched the auction carefully, prepared to jump in at the last minute thinking that this would somehow guarantee a winning bid. Unfortunately someone else had the same idea.
A short time later, the previous winning bidder posted a modified version of the same guitar for sale. This time I was the winning bidder. I purchased the guitar for about $50 more than its previous selling price. After I received the guitar, I disassembled it and promptly proceeded to ignore it for almost 14 years as I became a little too obsessed with adding other guitars to my collection.

Sad but true. That 2nd pickup cavity was truly a work of art.
This guitar looked like a lost cause, but I thought it had some potential. It had a pretty hilarious “custom” paint job; black with silver rays across the front of the body. It was all silver on the back. The original seller confessed that he knew nothing about guitars, and described it as a guitar from the 1960s or 1970s, and that “The neck seems to be in great cosmetic condition with 6 keys marked F.” The original pickup appeared to be missing, but a 2nd pickup had been added in a very rough cutout in the pickguard surrounded by white tape. The pickup looked as if it could have been a mini-humbucker, but back in the days of tiny images on eBay it was impossible to be sure. The listing also stated that the original Fender case was included.
When the guitar reappeared for sale a 2nd time, it was described as a 1974 model. The first seller simply described it as “old.” This time around, the guitar had a nicer looking black pickguard. The old pickup had been replaced by a new single-coil pickup without a cover. The original knobs had been replaced with what appeared to be Telecaster style knobs, but everything else seemed the same as before. The 2nd seller did include a better photo of the fretboard, and it did look like it was in very nice condition. Here is the actual description from the listing:
The guitar has been refinished and has some changed parts, but it is still a great sounding, fun little guitar. The frets have recently been dressed and polished, and are in immaculate condition! This guitar has been professionally set up and restrung, and comes with original Fender case.
Here’s the rundown of the ACTUAL condition of the guitar once I received it. The paint job was even more entertaining in person. The photos didn’t do it justice. I imagined a 12-year-old, future guitar god expressing his creative urge; Krylon, his medium of choice. The look of confident, victorious satisfaction on his face as he admires his magnum opus. The all-silver back side of the guitar was covered with what I would describe as a crackle finish. I’m not sure if this was the intention of the artist, or simply the result of sub-optimal surface prep.
I noticed that there was a variety of replacement screws used everywhere on the guitar. The pickguard and control plate were attached with flat head slotted wood screws from the local hardware store, and among the four screws attaching the neck, there were three different types. The replacement pickguard was poorly executed. It was missing a few screw holes, and the truss rod notch at the neck was pretty large and oddly shaped. Once I removed the guard, I was confronted by the body modifications made to accommodate the long lost 2nd pickup. The new hole in the body was so rough, I thought it must have been carved with a butter knife! The bottom of this hole was covered with a strange, unknown substance. There was a rough groove carved between this hole and the original pickup cavity to accommodate the additional wiring for pickup number two. A Jackson pickup with a visible break in one end of the winding now resided in the original pickup location. The brass shielding was in place under the pickup, and appeared at one time to be attached to the body with a loop of white tape. There was evidence of the original staple, which was now missing. The shielding was painted black along with the body.
Upon closer inspection of the control plate, I noticed that it had a worn brass finish – not chrome plated as expected. The Telecaster style knobs had the same type of worn brass finish. After referencing the original eBay listing pics, it’s obvious that this entire assembly was replaced before my purchase. When I looked under the plate, I could see that the non-original electronics were connected by some pretty sloppy soldering. The brass control cavity shielding was missing altogether.
Seller number two had removed the original Fender “F” neck plate with the stamped serial number, and had replaced it with a plain, generic version. It was pretty much impossible to see this when looking at the low resolution photos in the eBay listing, so… buyer beware. On a more positive note, the neck, frets and tuners were in very nice shape although the nut had become so worn over time that the strings were cutting grooves into the headstock end of the rosewood fingerboard.
I assume the case was actually original to the guitar after all. Although it was only a chipboard case, it was imprinted with a silver Fender logo on the top. Could it be more of a rarity than a hardshell case from the same era?

Body Repair/Restoration
The guitar sat around in pieces for a number of years before I finally began the restoration. I began by stripping the thick layers of old paint from the guitar body. I was then able to determine that the unknown substance at the bottom of the butchered part of the body was auto body filler. There was also evidence of a previous red paint job, although it didn’t appear to be from the factory.
I routed a clean edge around the rough pickup hole in preparation for patching. I ended up with a hole about 3/4″ deep, but still not deep enough to eliminate all of the Bondo. I decided that it wasn’t a good idea to go any deeper. Red paint was also visible at the bottom of this newly routed hole, again obviously not from the factory. I also routed a 2nd notch to remove the groove between the original pickup hole and the one being patched. I would patch this area as well.

After routing both areas to be repaired
The new patch would intersect the wiring channel between the pickup and control cavities. I decided to go ahead with the repair, and that I would worry about how to make the hole in the new piece of wood when the time came.
I used a thin piece of alder that I had on hand for the smaller patch. My original plan was to glue the patch in place, and then cut the inner contour of the cavity using a flush router bit. I ended up cutting the contour by hand since there wasn’t enough room to fit a router bit bearing under the patch.
I did not have a thicker piece of alder on hand for the larger patch, so I decided to use a piece of poplar. I was a little disappointed in myself after realizing how much of a gap there was between one edge of the patch and the body, but since all of these repairs would be hidden under the pickguard, I convinced myself not to worry about it. Both patches were glued in place, and all surfaces sanded flush to the body. In what seemed a fitting tribute to the previous owner with the butter knife, I used auto body filler to fill the gap around the new patch.
I was pleasantly surprised to find the perfect long drill bit that I needed to drill out the wiring passage. I assumed I would need to order a hard-to-find bit from a specialty tool supplier, but there it was; hanging right there on the wall of my local Home Depot. I marked a guide line on the face of the guitar to help me keep the drill pointed in the right direction. I just needed to drill though about an inch of material, and it worked perfectly.
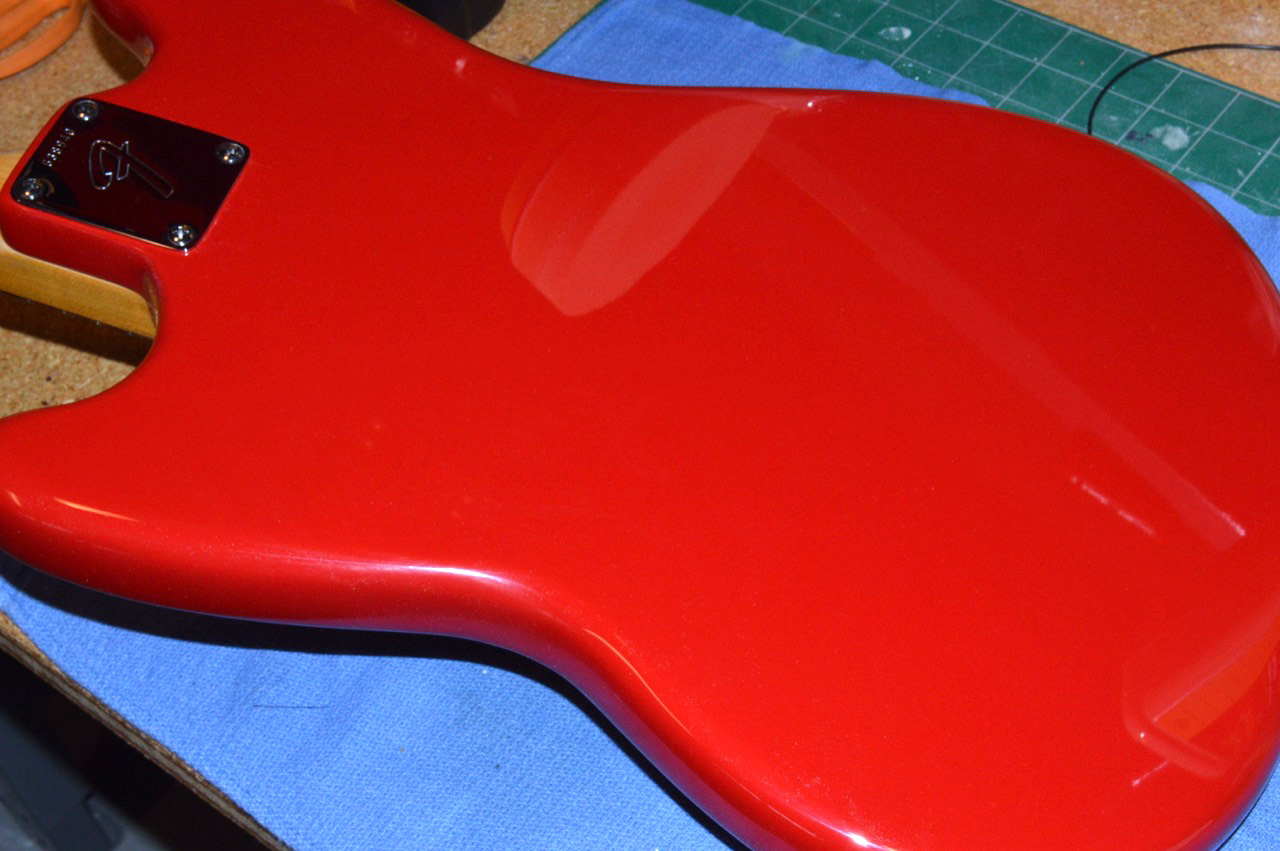
After a little bit of final sanding, the body was now ready to paint. I had originally intended to paint this guitar in Seafoam Green with a white pearl pickguard. This would have certainly been a nice color scheme, but as I became more concerned with originality I eventually decided to go with Dakota Red. This guitar was originally available in Black, Olympic White, Dakota Red and Daphne Blue. Since red is my favorite color, this became an easy choice. This color scheme would also go well with my 1966 Mustang in Olympic White with a red tortoise pickguard.
Neck Repair

Apparently a shim fabricated from a business card
As stated previously, the neck was in excellent shape. The nut on the other hand, was extremely worn to the point that the strings were cutting grooves into the rosewood between the nut and headstock. After removing the nut, I discovered a “shim” that was fashioned from thick printed paper. I removed this from the slot, and upon closer examination it appeared to be a strip cut from a business card. I carefully sanded away the glue and paper residue that remained in the nut slot, occasionally checking the contour with a radius guage.
Before installing the new nut, I first had to contend with repairing the area where the strings had worn grooves into the end of the fingerboard. I sanded a block of rosewood with #80 grit paper. I then filled the areas to be repaired with the wood dust I collected, and carefully applied a small amount of thin super glue to solidify the repair. I re-applied the mixture to any areas that weren’t completely filled the first time, and then carefully sanded the repaired areas smooth. I tried to confine the sanding to the fingerboard; staying clear of the headstock.
Once the repaired area was adequately smoothed and contoured, I masked around the area prior to spraying with clear lacquer. On the headstock side of the repair, I fashioned a soft-edge mask by using a rolled up piece of paper; similar to the “back-masking” technique used when spraying an auto body repair. I sprayed several very light coats of clear lacquer, resulting in a soft blend between the repaired area and the existing finish on the headstock. Once the lacquer was adequately cured, I carefully sanded the area smooth. For the final polishing, I used 3M polishing papers available from Stewart MacDonald. The transition between the repair and the existing finish on the headstock was virtually invisible.
The replacement nut required some attention before being glued into place. The center tab on the bottom side didn’t seem necessary, so I smoothed that away. The nut was slightly wider than the neck. I removed the extra material, and used only a small amount of wood glue to attach the nut. I would later adjust the depth of the string slots during final setup.
Refinishing the Body
Since this was to be my first complete body refinish job, I also had to come up with a method of handling the body while painting. I began working on my idea for a paint stand. Once I had something that was functional, I was ready to start the refinishing process. I continued to make modifications to the paint stand as I worked on other guitars, and I hope to post an article describing my process in the future.
The steps I detail below are loosely based on information from the ReRanch.com site. I did stray a bit from these instructions, but I was very appreciative for such a good source of information. I used the following products which were purchased from ReRanch: oil based grain filler, sanding sealer, white primer and clear lacquer. I purchased the Dakota Red color coat from Madison’s Music in Michigan. Ben, the owner of the business went above and beyond; assisting me with my search for a color match for my Teal Green Metallic Kay Silvertone 1417.
Surface Prep
Once the surfaces on the body were ready for paint and wiped down with naptha, I applied the oil based grain filler. The filler is applied against the grain, and once it sets up, you can remove the excess using mineral spirits. After the filler was thoroughly dry, I dry sanded with #220 grit and used a small drill bit held between my fingers to reopen screw holes that had become clogged with filler.
Sealer
Next I applied a coat of sealer (“Sand and Sealer” on the ReRanch site). I let it set up for a few minutes and applied a 2nd coat. I left this to dry overnight, and then dry sanded with #220 grit paper. After sanding, I applied another two coats of sealer, allowed it to dry again overnight followed by another pass with the #220 grit. I then dry sanded with #320 grit paper. I inspected for a uniform flat surface without any pits or shiny areas. Although everything looked good to me at this point, if necessary, you can still use sealer at this point to drop fill any low areas, and sand as needed to achieve a flat surface according to ReRanch.
Primer
Some guitars originally had a primer coat, some did not. Every example of this guitar that I examined online seemed to have a primer coat. The primer also provides you with a much more uniform surface for the color coat. This being the case, I would tend to apply a primer coat unless attempting to duplicate a finish that did not have it originally.
I applied 2 coats of white primer. After drying, I sanded with #320 grit, and then applied a 3rd coat. Once this was dry, I sanded once again with #400 grit.
Color Coats
Once I was convinced that I had removed any dust or foreign material from the dry primed surface, I began applying the Dakota Red color coat. I decided to apply three coats per session. In other words, I would spray a coat over the entire body, let it set up for a few minutes, and repeat the process two more times. I would then allow the paint to dry overnight and repeat the process the next day. I ended up applying almost 8 coats – using an entire 12 oz. can.
I should point out that during the various color coats, I discovered a very small “fleck” of something in the paint that I felt needed to be removed before moving forward. With the paint thoroughly dry, I used a small piece of #600 grit paper to sand away the fleck. Once I uncovered it in the red paint, it was bright white and very noticeable. It definitely needed to be removed, but it seemed to go on forever. I kept sanding until I began to worry that I would soon reach the primer coat. Thankfully it finally disappeared, but as I describe below there was more action required.
It is usually recommended that you color sand at this point before applying a clear coat. I felt that my color coat looked pretty flat as it was, with just a slight bit of texturing (orange peel). I eventually decided to lightly sand with #800 grit. It is NOT recommended that you color sand metallic colors. This tends to flatten out the metallic flakes in the paint and destroys the effect.
Clear Coats
I decided to follow my previous schedule for applying the clear coats – 3 coats per day. I cannot stress enough the importance of a clean, dust-free surface at this point. Spray clear coats in a clean area away from any disturbance in the air. In other words, do not spray this stuff outside.
You can wet sand between coats to remove any runs or particles with #400, #600, #800.
Once I applied my first clear coats, I could see an obvious dent in the finish where I sanded away the particle in the color coat. I decided to spray a few extra coats here to allow me to perform an interim wet sanding to level the surface. This seemed to do the trick. I continued to apply overall coats of clear until I emptied another can of lacquer. I ended up applying about nine total coats.
Sanding Polishing
Some suggest letting the finish “cure” for as much as a month before beginning the wet-sanding and polishing phase, but I’m not that patient. I did let the lacquer dry for a bit more than three days before starting to sand. Longer is obviously better if you have the patience.
I began wet sanding with #400 grit. Once I had a uniformly flat surface, I used progressively finer grades – #600, #800, #1000, #1200 #1500 and #2000. At this point, the surface appeared very smooth and dull with no visible sanding marks.

3M Finesse-It II, Meguiar’s 105 & 205
In the past I had always used 3M Finesse It II when making spot repairs on other guitars with good results. I had applied this polish both by hand, and with a foam pad in a hand held drill. I decided to use the same stuff here and expected to see a nice shiny finish when done. Although the end result looked good to me initially, I eventually felt that it still looked a little flat.
I had some Meguiar’s polish on hand that I had used for an auto body project, and I decided to give it a try. I started with an application of M105 Mirror Glaze Ultra-Cut Compound, using the drill and foam pad over most of the body, and then polishing by hand around the horns on the upper body. I followed up with an application of M205 Mirror Glaze Ultra Finishing Polish using the same technique. Note that I used a separate pad for each grade of polish. This worked like a charm, resulting in a nice, mirror-like finish.
TMI Regarding Pickguards
I was not prepared for the problems I would encounter while trying to find a replacement pickguard.
Everything seemed great at first. I began searching for a vintage replacement, and almost immediately found one on eBay that looked like a perfect candidate. I purchased it right away. When the package arrived, I excitedly opened it up to examine the contents. Inside I found a beautiful, vintage white pearl pickguard, with the perfect amount of old age mojo. I placed it on the body and immediately experienced that terrible sinking feeling. It didn’t fit! The pickguard had shrunk to the point of being unusable. Some of the screw holes were off as much as 1/8 inch. Since this was a vintage original pickguard, it was not cheap, and therefore it was a fairly expensive setback.

Vintage replacement pickguard
I next began to research sources for a new, custom-made guard. I found one source that also had a couple of positive online reviews from past customers, so I figured I would give them a try. I placed my order online, and asked some specific questions in the field they provided for special instructions on their order form. I understood that the older Fender pickguards had a wider bevel than the newer ones, and I wanted to make sure they would cut the bevel using the proper angle. My understanding was that the newer pickguards have a 45° bevel, while the older ones have a 30° bevel (or 60° depending on how you calculate it). I also wanted to make sure that they would cut the correct truss rod adjustment notch as on the original, since they did not indicate this on their template. I placed the order, but after a couple of days I still had no answers to my questions. I decided to send a follow up email to ask them to confirm that they would be able to cut the correct bevel angle, and add the truss rod notch. This time they replied back to me that they could do both.

Pickguard bevel angles
The turnaround time for the order was approximately two weeks. After a month, I tried calling them on the phone, but could only get through to their voicemail. They never replied to any of my messages. I was also emailing them, without reply. After almost two months had passed, I initiated a case with PayPal to get a refund. Almost miraculously, two days later I received a message from the company informing me that my order had shipped. OK, I thought. At least my new pickguard was on the way.
As you may have guessed, I was not too pleased with the pickguard once I finally received it. The bevel was cut at 45°, and the truss rod notch was nothing like the original; the two things I asked about specifically. Additionally, the new pearl material seemed to have an almost blue appearance compared to that of the aged vintage guard. This was not the fault of the vendor of course, but now that I had come to this realization, I would need my next pickguard to be made from a different material, or I would need to come up with a way to do some subtle aging on my own.
The silver lining of this story is that somehow I still got my refund.
As they say, the third time is the charm. I found the Pickguardian website, and began to think that I may have found the solution to my problem. I sent Tony (aka the Pickguardian) a message describing my dilemma, and he quickly replied. He assured me that the bevel and notch were not a problem. I was impressed by the fact that he asked me to send him a tracing of the pickup cavity, neck pocket and screw hole locations from my specific guitar body. He also had a parchment pearl material available that looked very similar to the vintage aged pickuard that I purchased so long ago. I placed my order, and sent him the tracing along with the vintage pickguard as a reference.
This time, I received my new pickguard within a very reasonable amount of time, and I could not have been more pleased with the result. The craftsmanship was flawless, and the fit was perfect. Every screw hole matched exactly, and the fit at the bridge and control panel was perfectly flush. Needless to say, the bevel and notch were as requested.
In the time since, I have done some pickguard projects of my own, but at any point in the future that I require expert assistance, I will be contacting Tony. I highly recommend him.
Final Assembly
Now for the fun part! I began the assembly process by attaching the neck. I mentioned previously that the seller swiped the original neck plate, and installed a generic un-stamped replacement. Fortunately, the original seller included the serial number in the eBay item description. Since I saved a copy of this listing I had a record of the missing number. Better yet, I found a source for a new Fender “F” neck plate stamped with the serial number of my choice, thanks to eBay seller ronkirn. If you happen to recognize the name, you also know it was done right!
I disassembled the tailpiece, and cleaned and polished all of the individual parts. I reattached it to the body using correct new Fender screws.
I purchased a vintage, period-correct Fender pickup to replace the DOA Jackson. The serial number indicates that it was manufactured during the 18th week of ’74. I soon regretted the fact that I purchased a pickup that had been snipped out of a guitar with such short leads, rather than one with the entire leads intact. I spliced extensions to each wire, and used heat-shrink tubing to insulate the repairs.
I located and purchased a vintage set of electronics consisting of both pots, capacitor and jack. The 1377310 codes on the pots translate to CTS Corporation (Chicago Telephone Supply) during the 10th week of 1973. These were all attached to a vintage control plate, with some factory markings still visible on the underside. I topped everything off with a set of repro knobs from Allparts.
Although I had the original piece of pickup shielding, I was missing the piece used in the control cavity. I was prepared to fabricate one out of sheet brass, but I found a set of shielding from a vintage Mustang for sale, which I promptly purchased. I appropriated the one piece that I needed, along with the glazing points used to secure it to the body. I also used one of the staples from the Mustang set to attach the Music Master pickup cavity shielding.
Once the shielding and electronics were in place and properly connected, I attached the pickguard and control plate using new Fender screws. I also attached a pair of strap buttons, again using new Fender screws.
I installed a new set of strings, and only had to make the slightest adjustments to the string slots on the new nut. I have a set of files from Stewart MacDonald that are designed specifically for this task. After making a few more adjustments to the bridge to set up string height and intonation, I was finally ready to play this guitar for the first time in 14 years.
I admit that I was a little nervous as the moment of truth approached, but once I plugged it in and began to play, I was extremely pleased! It was a pleasure to play, and it sounded great. The guitar was in such bad shape when purchased, I immediately thought of Victor Frankenstein screaming, “It’s alive!” Then I thought about his grandson Frederick screaming, “Life! Life do you hear me? Give my creation life!” Then I thought, “What knockers!” Then I thought I might have to name this guitar Inga.
I also love the way this guitar looks. I love the red and white/pearl color combination. I also love the fact that even though the fingerboard and frets are in pristine condition, the back side of the neck shows quite a bit of honest playwear. Genuine Music Master mojo.